Guitar Parts and Kits Help You Build Your Own Custom Guitar

 Many guitarists would like to try their hand at building their own guitar but don't know where to start.  They don't have the knowledge or skills or the tools to build a guitar from scratch.  Fortunately there are several solutions to their problem buying guitar parts and assembling them yourself,or a guitar kit.  First decide whether you want an electric guitar or bass, or an acoustic guitar.  The process for building an electric guitar and bass is the same.  Once you decide what you want you can purchase the goods and get to work.

Solder Iron

Guitar Parts or Guitar Kits for an Electric Guitar
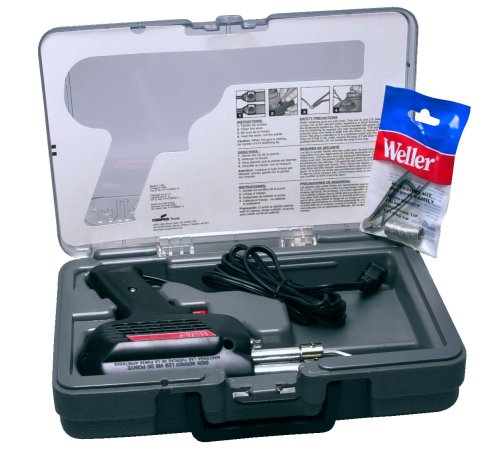
Solder Iron

If you want an electric guitar there are several things you can do.  The first is to buy all your parts from various sources and put them together yourself, then finish with a spray can.  You can even find parts already finished that you simply put together.  There are some problems with assembling already finished parts.  If the parts don't fit, you'll have to sand or otherwise work on those parts thereby destroying or marring the finish you just purchased.  It's probably better to buy unfinished parts, unless you can find factory authorized parts that are guaranteed replacements.  That way you'll know that all parts from the same brand will fit together.  If you do buy parts from separate sources you may have to tweak them.  You shouldn't need a full workshop full of tools, sandpaper, files, and maybe a chisel should be all you need for shaping the neck or neck pocket, which is where you'll be likely to run into problems.  You might need a reamer if your tuners don't fit the drilled holes in the neck you have.  A reamer is better than a drill, because it self centers, and it isn't as expensive.  Other than that you'll need a soldering iron for the electronics and assorted screwdrivers for attaching the bridge, tuners, pickguard, strap buttons, etc. 

You can also buy an electric guitar kit.  The kit will come with everything you need except tools, You'll usually need screwdrivers, sandpaper, a hobby knife, and soldering iron.  Some kits come with electronics that snap together so you won't need the soldering iron.  Be prepared to do some tweaking to get parts to fit though.  The tuners in some of the kits aren't always the best, that should be about the only thing you'd want to replace.  I've gotten Saga guitar kits where the bridge was actually higher quality than the stock parts.  Look around the net for reviews, a lot of people have had great success with Saga Guitar kits, they're cheap, easy to assemble and need minimal tools. Most people will want to finish them with spray cans, this is the cheapest option for a one-off guitar.  

Acoustic Guitar Kits

If you're wanting to build an acoustic guitar then you'll probably want an acoustic guitar kit.  These come in various stages of construction, some are almost like building a guitar from scratch, some are almost like the "bolt together" electric guitar kits.  Unless you're really serious, get a guitar with pre-bend sides.  If you don't you'll need a specialized tool called a bending  pipe, which is expensive to buy.  It's simple to build, but you may have problems sourcing the parts, and actually bending the sides is a challenge too.  You'll probably need a few more tools than you would building an electric guitar from parts.  You will probably need a small plane, like a block plane and possibly a saw, and router or purfling cutter a specialized tool for cutting channels for the binding.  It's much trickier building an acoustic than an electric guitar, and you'll need at least a some woodworking skills.  Finishing the acoustic guitar is basically identical to the electric.

If you're serious about building a guitar there are numerous options open to you depending on your skill level and tool chest.  You can search the internet for reviews, prices, and other peoples experiences on building a guitar before you decide if it's right for you.

Guitar Parts and Kits Help You Build Your Own Custom Guitar
Solder Iron

Special Price!!! Weller WP35 35-Watt Professional Soldering Iron

Nov 09, 2011 04:14:18

Weller WP35 35-Watt Professional Soldering Iron
Click for larger image and other views

Weller WP35 35-Watt Professional Soldering Iron

>> Click here to update Cheapest prices for Weller WP35 35-Watt Professional Soldering Iron <<

Weller WP35 35-Watt Professional Soldering Iron Feature

  • Ideal For A Wide Variety Of Electronic Tasks
  • Uses St Series Long Life Double-Coated Iron-Plated Tips
  • Tip Temperature: 850°F
  • Quick-Change Knurled Collar and Stainless-Steel Barrel
  • Light Blue With Cushion Grip Handle and Plug-In Heating Element


Weller WP35 35-Watt Professional Soldering Iron Overview

Product Features: # Ideal for a wide variety of electronic tasks - has ST3 soldering tip # Uses ST series long life double-coated iron-plated tips # Tip temperature: 850°F # Quick change knurled collar - stainless steel barrel # Light blue with cushion grip handle and plug-in heating element # 6' 3-wire cord - iron is 7 7/8 long # IMPORTANT: Use only Weller® tips # UL and cUL listed (120 VAC units only)


SAVE NOW on the special offers below!

Available In Stock.

This Weller WP35 35-Watt Professional Soldering Iron ships for FREE with Super Saver Shipping.

Price : Click to Check Update Prices Please.

Weller WP35 35-Watt Professional Soldering Iron

Limited Offer Today!! Weller WP35 35-Watt Professional Soldering Iron Black Friday and Cyber Monday Deals

Whey Protein Mix Soldering Gun 40 In Hdtv

Steps on How to Build Homemade Solar Panels

Before we discuss about how to build homemade solar panels, let us first tackle the mechanics or how solar panels function. These panels basically operate by generating power or electricity with the use of specific measures of light intensity. For it to be able to give its optimum performance, the panels require both low temperature and direct sunlight.

Solder Iron

Nowadays, it has become much simpler and easier to make your very own panels since there are all the methods and kits available out there. We all know that having solar panels helps a lot, especially with electric bills, since they help you produce power on your own.

Solder Iron

In building solar panels, all of the components needed to create it are actually provided for in almost all of the kits. The components that we have just mentioned mainly comprise of solar cells, solder, soldering iron, tabbing, and flux. These kits also include instructions so it does not necessarily take a professional or expert to construct solar panels at home. All you have to do is simply follow the instructions provided for step-by-step. Web forums will also help a lot in informing you about the installation and you can post your own questions to make the job a lot easier. If ever you see that you might need a tad more energy output, you just have to put in additional panels to enable you to produce the amount of power that is actually needed.

Another benefit or advantage in installing and building solar panels is that they produce green energy that makes it ecologically friendly. Compared to the other source of electricity that emits harmful elements contributing to pollution, solar power is hazard-free and does not emit such awful chemicals.

Solar panels basically come in two types. One generates power through heat and the other generates power through electricity. The ordinary panels make use of solar energy in heating water, usually to provide for the conventional necessities in the home. It has an absorber that transforms radiation derived from the sun into the form of heat. The other kind of solar panel is otherwise known as the photovoltaic panel. What it does is it converts your basic light into the form of electricity. It is normally mounted on roofs and the power generated by these panels is directed into a battery that functions as the device where electricity is being stored. It is that battery now that supplies the electricity needed by your household. These are the few basic steps on how to build homemade solar panels.

Steps on How to Build Homemade Solar Panels
Solder Iron

Epson Projector Laptop Hard Drive Enclosures Lcd Touchscreen 7

Stahl Tools SSVT Variable Temperature Soldering Station

Special Price!!! Stahl Tools SSVT Variable Temperature Soldering Station

Nov 07, 2011 04:52:30

Stahl Tools SSVT Variable Temperature Soldering Station
Click for larger image and other views

Stahl Tools SSVT Variable Temperature Soldering Station

>> Click here to update Cheapest prices for Stahl Tools SSVT Variable Temperature Soldering Station <<

Stahl Tools SSVT Variable Temperature Soldering Station Feature

  • On/off switch with "power-on" indicator light
  • Variable heat setting
  • Cushioned rubber grip
  • Replaceable heating element
  • Quality performance at a discount price


Stahl Tools SSVT Variable Temperature Soldering Station Overview

The Stahl Tools variable temperature soldering station is designed to exceed the expectations of veteran technicians—at a price that's appealing to the electronics hobbyist. Many different soldering tasks are accomplished easily by using the adjustable 5 to 40 watt temperature adjustment. The lightweight pencil iron features a fatigue-reducing rubber grip, and a Bakelite-ringed holder keeps the iron at the ready. A field replaceable, precision ground, iron-plated solid copper tip provides maximum heat transfer, minimizing cold solder joints. Includes tip cleaning sponge. Additional tips available for a variety of soldering applications. Stahl Tools—The Technician's Friend™


SAVE NOW on the special offers below!

Available In Stock.

This Stahl Tools SSVT Variable Temperature Soldering Station ships for FREE with Super Saver Shipping.

Price : Click to Check Update Prices Please.

Stahl Tools SSVT Variable Temperature Soldering Station

Limited Offer Today!! Stahl Tools SSVT Variable Temperature Soldering Station Black Friday and Cyber Monday Deals

Vacuvin Marinater Docking Speaker System Saw Laser

How to Iron a Shirt Properly

Ironing a shirt is not as simple as you would first think. First things first: you need to have a good think about your iron. Small and cheap irons are fine for students and those who need to carry one around when traveling but on a day-to-day basis, you need something far more robust. A textured plate will distribute heat better than a flat steel plate and 'non-stick' technology will keep your iron serviceable should you misjudge which setting to use for a synthetic fabric! Your iron also needs a good point at the tip as an iron with a blunter tip will not give decent definition to shirt cuffs or around the shoulders. I would also say that you should know your consumer rights and keep your warranty to hand as a leaky iron is incredibly frustrating. Bear in mind though, your iron isn't leaky if you have it on a low temperature setting and you're trying to use the steam function.

Solder Iron

Some materials marketed as 'non-iron' do in fact need a quick once over but you need to be cautious as these synthetic fabrics will be destroyed if your iron is too hot. Cotton and linen need to be ironed at much higher temperatures to get the desired effect.

Solder Iron

When ironing a shirt, you must first start with the shoulder panel at the back. Hook the one shoulder over the end of the ironing board and iron before stepping around to the other side of the board to hook the second shoulder to complete the panel. Then, you need to continue down the back but remember, some shirts have a fold in between the shoulders. Before moving onto the front panels, to keep this fold pristine, use your hands to flatten it down in exactly the right place and hold the iron down on top to press. Iron the front panels in turn, press the collar and then the final part is the sleeves. Some people don't like a fold down the top of the arm. If you are one of these people you need to ignore the seams. Place the arm of the shirt with the seam underneath the arm and press the iron down. Find the seam again and lay it horizontal to you body as you normally would but do not use the iron near the top of the arm where you have just ironed other wise you will end up ironing in a crease. Finally, undo the cuffs and with the tip of the iron, iron 'up' the cuff rather than across it. Pop it on a hanger and its done!

Finally, this may sound ridiculous but don't try and iron your clothes when you're wearing them. I met a man who noticed he'd missed a crease in his shirt and tried to iron it out on his stomach rather than taking it off. Irons need time to cool down properly and he still has an iron-shaped scar on his stomach. A warning to us all!

How to Iron a Shirt Properly
Solder Iron

5 Disc Cd Stereo

Stained Glass Equipment

Glass equipment as an artwork was known to people since times. The popularity of stained glass was revived in the 1960s. The stained glass art and equipment was earlier confined to decorating churches, state owned buildings and few residences. From 1960 onwards, stained glass came to be extensively used for making jewelry boxes, mirrors, wall sconces, windows and other decorations.

Solder Iron

Every form of art and craft requires some kind of investment in special tools or equipment. Some basic equipment needs to be used for making stained crafts in glass too. The everyday tools used at homes like scissors and pliers can also be put to use. However, using the proper kind of equipment will produce a better stained glass art. Poor quality of tools can lead to irritation and abandonment of the project. It would be good to use the below mentioned stained glass equipment.

Solder Iron

It is advisable for beginners not to initially invest a lot on the stained glass equipment. A specially designed, unusual pair of pattern shears will be needed for making the craft. This can be bought for twenty dollars and above. Cheaper, twenty-five cent substitute, razor blades can also be used. Regular household scissors can also serve the purpose for amateurs.

As the artwork skills turn profitable, better stained glass equipment can be bought and used. Moving on with the basic list, soldering iron with an iron cased tip would be an important tool. Soldering iron can be found in any local hardware store or depot. Its price varies from ten to fourteen dollars. It is suggested not to buy a cheap soldering iron as they do not heat uniformly and do not last longer. Those who are seriously committed to make a stained glass work can buy a 100 to 150 watt soldering iron.

The temperature of the soldering iron should be controlled by a dimmer or a resistor. It prevents the iron from getting overheated. Such a rheostat unit can also be purchased separately to plug-in the soldering iron for use. Another necessary supply is the glass cutter. It is relatively cheaper, priced from three dollars and above. You can buy two different shaped cutters. When not in use, glass cutters soaked in kerosene or oil remain lubricated and reduce friction.

A basic glazing knife is used for various purposes while crafting a stained art glass. It is used to shape the edges of the glass or the lead. Grozing pliers with sleek and narrow jaw saves your fingers while working on delicate glass and glass breaks. A lead stretcher or any other vise, except wood or pipe vises, help to hold the lead strip for stretching. It is more flexible and bends easily along the edges of the stained glass pieces.

Among the equipment, flux is a chemical to clean the copper foil or lead vise when preparing for soldering the stained glass. When buying the most essential supplies for the craft, the glass itself, you can visit a crafts shop that sells glass. It can also be shipped or ordered by mail from a specific glass manufacturer.

Stained art glass is priced higher than normal glass used for windows. When bought in bulk, it can cost you less. Prices range from four dollars for a square foot and higher depending on size and quality. Glass equipment also includes solder, drawing paper and carbon paper. Solder can be bought from any hardware store for less than two dollars a spool which would be sufficient. Drawing and carbon papers can be used for sketching the artwork patters for glass.

Use goggles and gloves for protecting you eyes and hands. Assemble all the equipment in your work area or a safe place out of kids reach. Using the proper tools, creativity and dedication, stained glass proves to be a profitable hobby.

Stained Glass Equipment
Solder Iron

Water Bottle 42 Inch Led Hdtv Women Supplements

The Way to Repair Your Stained Glass Window Pane

If you have some experienced in stained glass handi-crafts repairing your old or damaged stained glass window pane is a project you may think about doing yourself. This article assumes you have at least some experienced in this craft. If your window is very valuable, if you do not have any practiced in stained glass window pane making or if you lack trust in yourself this is a task you may wish to leave to the experts. Otherwise, the process is very much like creating a new stained glass window pane and even somewhat easier in the sense that you don't have to do much, if any, glass cutting.

Solder Iron

Problem #1: The leaded stained glass window cames are about seventy years old (or older) and have grown brittle causing bulging or breaking.

Solder Iron

This typically begins to happen in a stained glass window over seventy years old. Lead does not rot or rust, but it does lose its elasticity and become brittle over the course of time. If left unattended it might result in the stained glass pieces to fall out or break as well.

The Answer:

Re-leading the window pane. This is of a problem, but very worthwhile to regenerate your stained glass window to its original beauty and integrity. The following steps have to be taken:

1. Take a photograph of the window pane and measure lead cames to aid with reconstructing it later.

2. Take the board out of the window pane frame and remove board framing.

3. Next, you will require to take the whole panel apart using the soldering iron to loosen solder and gently pry the old cames from the glass pieces.

4. Dispose of old lead in an safe for the environment way, you should probably take it to a metal recycling facility.

5. Next each piece of glass should be thoroughly cleaned and dried. Lay the pieces in place so as not to grow confused later.

6. Reassemble panel using with new lead cames in the same width as the original.

7. Broken stained glass pieces should be traced and matched as closely as feasible to a new piece of glass cut with the pattern you create. Another option if you will be able to have as much broken pieces and either cannot match the stained glass closely sufficient or don't need to put new pieces in, is to use thin lead cames to hold the broken pieces together. This option will likely make it obvious that the window pane has been repaired, so use with care.

8. New cement should be applied to both sides

9. New reinforcement bars should now be attached.

10. The stained glass plank is now ready to be re-framed and re-hung.

This action should be done when the window is nearing seventy years of age. Following the steps above should lead to a complete restoration of your stained glass window and it should be as structurally good as a new one.

Problem #2: One stained glass board in a window pane under 70-years-old is broken.

The Answer:

This will depend on the location of the broken piece. If it is near the fringes, you can be in a position to get away with carefully breaking the damaged piece out of the frame and using the soldering iron to loosen the lead cames and then re-soldering the new piece in place as in #7 above. If the broken piece is in a challenging location or if there are several broken pieces, you may like to re-lead the complete window pane following the above directions. If there is a small crack, you could think about using a glass repair kit from the automotive shop. These are employed to set small chips and crevices in windshields and if the harm is slight, may well be a fitting way to repair the crack and stop further damage.

There are many other small repairs that you can do yourself such as painting areas that have flaked off, but these will ought to be removed and re-kilned and you may wish to confer with an expert for help with that. Restoring your glass window pane may be a painstaking process, but it is worthwhile to preserve its original beauty and make it last for future generations.

The Way to Repair Your Stained Glass Window Pane
Solder Iron

Blueray Dvds

Can I Build My WiFi Antenna?

As the number of portable computing and communication devices grew, so does the demand to connect them to outside world. To go on line the computers had to be plugged into a telephone wall socket. Requiring a wired connection to fixed network meant that computers were portable, but not mobile.

Solder Iron

To achieve true mobility the computers need to use radio(or wireless in that case) signals for communication. . In this manner, dedicated users would be able to read and send email while driving or moving to other rooms etc. A system of portable computers that communicate by radio are known as wireless LAN. Therefore to provide mobility to the systems, wireless local area networks were developed and now a new technology "Wi-Fi" or 802.11x(IEEE standard for wireless LAN setup), has become the most popular worldwide standard for the wireless communication in LAN..
Nowadays all major Laptop manufacturers provide an in built wi-fi system. Work is being done to make various devices like mobile phones, mp3 players etc to be wi-fi enabled.

Solder Iron

In order to meet the growing demand for wi fi networks, various public places are provided with them.

In order to enhance the wireless capabilities the antennas are developed and are now available in the market, though they are easy to install but these antennas are very expensive. Hence it would be a great thing if it is possible to make our own antennas with some readily available goods. We would need a cable (also known as pigtail) to connect wireless interface card with the antenna. We would also need two kinds of connectors, a N-male connector to connect one end of the cable to antennas and an appropriate connector to connect the wireless interface card with cable. Since the making of antenna requires wire, we would also need a soldering iron to solder wires.

ADVANTAGES OF DESIGNING OUR OWN ANTENAS

The construction of our own antennas provides various advantages to us. Apart from being cheaper than the antennas available in market they are also easy to configure into our system. So instead of investing huge amounts of money in antennas we can better manage that money by adding them to buy better Laptop systems.

There is also time factor involved in making your own antennas system. Since it is easy and faster to make and install our own antennas, it saves lot of time. Hence designing and making our own antennas would provide a better facility to the total cost involved in configuring the communication system

Can I Build My WiFi Antenna?
Solder Iron

Special Price!!! Stahl Tools SSVT Variable Temperature Soldering Station

Nov 01, 2011 23:01:26

Stahl Tools SSVT Variable Temperature Soldering Station
Click for larger image and other views

Stahl Tools SSVT Variable Temperature Soldering Station

>> Click here to update Cheapest prices for Stahl Tools SSVT Variable Temperature Soldering Station <<

Stahl Tools SSVT Variable Temperature Soldering Station Feature

  • On/off switch with "power-on" indicator light
  • Variable heat setting
  • Cushioned rubber grip
  • Replaceable heating element
  • Quality performance at a discount price


Stahl Tools SSVT Variable Temperature Soldering Station Overview

The Stahl Tools variable temperature soldering station is designed to exceed the expectations of veteran technicians—at a price that's appealing to the electronics hobbyist. Many different soldering tasks are accomplished easily by using the adjustable 5 to 40 watt temperature adjustment. The lightweight pencil iron features a fatigue-reducing rubber grip, and a Bakelite-ringed holder keeps the iron at the ready. A field replaceable, precision ground, iron-plated solid copper tip provides maximum heat transfer, minimizing cold solder joints. Includes tip cleaning sponge. Additional tips available for a variety of soldering applications. Stahl Tools—The Technician's Friend™


SAVE NOW on the special offers below!

Available In Stock.

This Stahl Tools SSVT Variable Temperature Soldering Station ships for FREE with Super Saver Shipping.

Price : Click to Check Update Prices Please.

Stahl Tools SSVT Variable Temperature Soldering Station

Limited Offer Today!! Stahl Tools SSVT Variable Temperature Soldering Station Black Friday and Cyber Monday Deals

Projector Video

How to Build a Rabbit Hutch

Having a rabbit inside your residence means that you have to construct a secure and comfortable home for it. Building a rabbit hutch will answer that problem. It is a very simple endeavor that you will love doing and your pet will love living in it.

Solder Iron

MATERIALS NEEDED IN BUILDING A RABBIT HUTCH

Solder Iron

The materials that you needed for this project are wire sheets, wire cloth, eight metals rods, hinges, formica sheet, two by four stock, staples and solder.

TOOLS

The tools needed are screw driver, wire snips, gloves, coping saw, staple gun and soldering iron.

STEPS IN BUILDING A RABBIT HUTCH

The usual size for a hutch should be 4 times the size of your pet. You can use different materials but do not forget that there are some smells that permeates from any pet. It is advisable to use metal instead of wood as the latter retains smell. But a wooden enclosure presents a more interesting aesthetic in an open area while a metal enclosure may be a favorable choice in a confined area.

A wire mesh is a terrific option for the roof and walls of the enclosure but do not utilize for the floor as it will be dangerous for the paws of your pet. A wire cloth is a better option than a wire mesh as it will also allow your pet's urine to filter out of the set-up. Use snips to carefully cut the flooring to the required size.

You can a wire mesh for the walls whether you use a metal or wood rod frame. But you should remember to use a soldering iron if you chose a metal frame and staple gun if you chose a wood frame for your pet's protection. Carefully lay down the frames that you have picked to use. Divide the frames to the size needed. For a metal frame, solder the side walls and then connect the front and back rods.

Determine the entrance location from same board or rod and place a rod on both sides of the entrance location. Build a door frame to match the entrance size. Screw the door hinges and door latch to the entrance and frame. For a frame made out of metal, place the mesh onto the hutch frame that you have made. Fix any bumps that you will see.

Secure the pair of corner points with a soldering iron. Normally, you will just need 2 pairs of wire wall: the entrance, roof and the wall of the floor. For additional floor protection, cut two by four stock to serve as the enclosure's feet. Secure it with staples.

Rabbits frequently urinate, so cut a portion of Formica to the size needed and insert it under the enclosure. You now have a place where your pet will enjoy living in for a long time.

How to Build a Rabbit Hutch
Solder Iron

Roku Player Samsung 40 Inch 1080P 120Hz 46 Inch Led Lcd Tv

Weller WM120 12w/120v Pencil Thin Soldering Iron

Special Price!!! Weller WM120 12w/120v Pencil Thin Soldering Iron

Oct 29, 2011 13:24:45

Weller WM120 12w/120v Pencil Thin Soldering Iron
Click for larger image and other views

Weller WM120 12w/120v Pencil Thin Soldering Iron

>> Click here to update Cheapest prices for Weller WM120 12w/120v Pencil Thin Soldering Iron <<

Weller WM120 12w/120v Pencil Thin Soldering Iron Feature

  • Lightweight, pencil thin soldering iron with stay-cool handle
  • Designed for soldering miniature components
  • Develops tip temperature of 800 Degree F
  • Comes with 6 foot cord and 3-wire grounded plug
  • Made in Mexico


Weller WM120 12w/120v Pencil Thin Soldering Iron Overview

WM120 Thin Pencil Soldering Iron 12W miniature, lightweight, pencil thin soldering iron. Weighs 7 oz. and measures 7" less tip. Tip temperature of 800°F. Uses MP series tips. (USA)


SAVE NOW on the special offers below!

Available In Stock.

This Weller WM120 12w/120v Pencil Thin Soldering Iron ships for FREE with Super Saver Shipping.

Price : Click to Check Update Prices Please.

Weller WM120 12w/120v Pencil Thin Soldering Iron

Limited Offer Today!! Weller WM120 12w/120v Pencil Thin Soldering Iron Black Friday and Cyber Monday Deals

Non Stick Cookware Samsung 32 Led Lcd Saw Bench

TEKTON 7266 30-Watt Soldering Iron

Special Price!!! TEKTON 7266 30-Watt Soldering Iron

Oct 27, 2011 21:19:36

TEKTON 7266 30-Watt Soldering Iron
Click for larger image and other views

TEKTON 7266 30-Watt Soldering Iron

>> Click here to update Cheapest prices for TEKTON 7266 30-Watt Soldering Iron <<

TEKTON 7266 30-Watt Soldering Iron Feature

  • Insulated Pencil-Type Polymer Handle
  • Replaceable Nickel Plated Tip
  • UL Listed
  • Complete with Tip Stand
  • General-Purpose Soldering Iron for Electronics Repair, Wiring Connections, Automotive Electrical System Repairs, and Circuit Boards


TEKTON 7266 30-Watt Soldering Iron Overview

MIT 30-WATT SOLDERING IRON features: Operates at 30-Watts Using 110-120 Volts, Insulated Pencil-Type Polymer Handle, Replaceable Nickel Plated Tip Heats to 700 degree, 5-1/2 Ft. Power Cord, UL Listed, Complete with Tip Stand, Use for Any Fine Soldering Project Including Electronic Repair, Speaker Connections, Computer Repairs, Hobbies, ect.


SAVE NOW on the special offers below!

Available In Stock.

This TEKTON 7266 30-Watt Soldering Iron ships for FREE with Super Saver Shipping.

Price : Click to Check Update Prices Please.

TEKTON 7266 30-Watt Soldering Iron

Limited Offer Today!! TEKTON 7266 30-Watt Soldering Iron Black Friday and Cyber Monday Deals

10 Tablet Pc Android Hd Digital Media Player

Weller WP35 35-Watt Professional Soldering Iron

Special Price!!! Weller WP35 35-Watt Professional Soldering Iron

Oct 26, 2011 21:46:42

Weller WP35 35-Watt Professional Soldering Iron
Click for larger image and other views

Weller WP35 35-Watt Professional Soldering Iron

>> Click here to update Cheapest prices for Weller WP35 35-Watt Professional Soldering Iron <<

Weller WP35 35-Watt Professional Soldering Iron Feature

  • Ideal For A Wide Variety Of Electronic Tasks
  • Uses St Series Long Life Double-Coated Iron-Plated Tips
  • Tip Temperature: 850°F
  • Quick-Change Knurled Collar and Stainless-Steel Barrel
  • Light Blue With Cushion Grip Handle and Plug-In Heating Element


Weller WP35 35-Watt Professional Soldering Iron Overview

Product Features: # Ideal for a wide variety of electronic tasks - has ST3 soldering tip # Uses ST series long life double-coated iron-plated tips # Tip temperature: 850°F # Quick change knurled collar - stainless steel barrel # Light blue with cushion grip handle and plug-in heating element # 6' 3-wire cord - iron is 7 7/8 long # IMPORTANT: Use only Weller® tips # UL and cUL listed (120 VAC units only)


SAVE NOW on the special offers below!

Available In Stock.

This Weller WP35 35-Watt Professional Soldering Iron ships for FREE with Super Saver Shipping.

Price : Click to Check Update Prices Please.

Weller WP35 35-Watt Professional Soldering Iron

Limited Offer Today!! Weller WP35 35-Watt Professional Soldering Iron Black Friday and Cyber Monday Deals

Dewalt 18V Cordless Weight Loss Vitamin

Make a Solder Free Stained Glass Box

Solder free stained glass boxes are fun to make. You can make these boxes to hold jewelry, mementos, or anything else you want. Their size can be customized to your need or space. In just an hour, you can make one of theses boxes.

Solder Iron

To make a square or rectangular box, cut a piece of glass or mirror for the bottom of the box. The size of this piece will be the size of the box you want to make. To cut the sides of the box, first determine how deep you want the box. Then cut 2 pieces of glass that is the same length as the glass you cut for your bottom piece by the height you desire. Then cut 2 more pieces, the width of the bottom piece minus 1/4 inch (the thickness of the glass times 2) and by the same height you cut the other two pieces. The last 2 pieces you need to cut is for the top of the box. Using the bottom glass for you pattern, cut one piece of glass that is 1/2 inch bigger on all four sides and one piece that is 1/4 inch smaller on all four sides.

Solder Iron

Once all your pieces are cut, lightly grind all the edges. Then clean and dry all the pieces and you are ready to assemble your box. To assemble box, you will need Weldbond glass glue. It is strong and it dries clear.

Using a thin line of glue on the edges of the side glass and attach them to the outer surface perimeter of your bottom piece. Do this one piece at a time. If excess glue squeezes out, use a damp q-tip to wipe off excess. Once all four sides of your box are glued, set it aside to dry. To make the top of your box, center the smaller top piece on the larger top piece. Use only a few small dots of glue to adhere these two pieces together. Let all pieces thoroughly dry (24-48 hours).

To embellish the top of your box, you can attach glass nuggets or whatever else you would like.

Make a Solder Free Stained Glass Box
Solder Iron

Black And Decker Power Drill Digital Video Player Panasonic Home Theater

Soldering Iron Holder

Special Price!!! Soldering Iron Holder

Oct 24, 2011 08:59:15

Soldering Iron Holder
Click for larger image and other views

Soldering Iron Holder

>> Click here to update Cheapest prices for Soldering Iron Holder <<

Soldering Iron Holder Feature

  • Holder w/ Sponge


Soldering Iron Holder Overview

Soldering Iron Holder


SAVE NOW on the special offers below!

Available In Stock.

This Soldering Iron Holder ships for FREE with Super Saver Shipping.

Price : Click to Check Update Prices Please.

Soldering Iron Holder

Limited Offer Today!! Soldering Iron Holder Black Friday and Cyber Monday Deals

Drill Bosch Hdtv Lcd Vizio

How to Solder For Radiator Repair

Radiator is a dynamic and an imperative to regulating the car's temperature low like perspiration, which is the body's ability to keep you refrigerate. The auto radiator uses ambient air to cool down the coolant that flow through, it is usually at the front of the vehicle. Automobile radiators are either made up of aluminum or brass and copper. Plastic could also be used for the tanks at either ends. The radiator repair techniques may differ, depending on the automobile and other material.

Solder Iron

There are two main kinds of radiators; one is cross flow and the other is vertical flow. You need to locate the tanks. Whether they are at the top or bottom, then it is a vertical flow. If they are on the sides, then it is a cross flow. You need to check the tanks if they are made of metal or plastic. The radiator construction material must be determined. The radiator must be made of brass or copper if it is painted. If it is shiny like chrome, the radiator is made of aluminum.

Solder Iron

Repair could be done many times, if the damage to the radiator is not wide-ranging and extensive. The repairs could be done many times by soldering. Soldering is not like welding or brazing as it does not bond together the two models physically, but it is a similar patch, which is considered to be a pleasant one. Welding is considered to be necessarily better and gives an improved outlook. As much as the solder repair is of a good quality, the bond for the radiator could last for the lifetime.

There are specific instructions that could be followed;

The first step is to make the damaged and fragmented area ready for soldering. This involves removing the paint with a wire brush, or by using a small grinding wheel along with removing any sharp edges or burrs that might occur. You must be careful, not to make the damage grow worse, if you are using a grinder, as the radiators are made up of ultra-light material. You can then clean the area with strong solvents like brake or Green cleaners, so that the fuse support and stay with the radiator without causing any problems.

The next step is that you should solder the damaged and troubled area thoroughly. You must use a high-wattage soldering solid wire or metal. You need to heat up the gun carefully to get the solder melt down and bonds with the surface of the radiator. Then heat up the damaged part of the radiator along the soldering iron, introducing the wire slowly with it, try not to drip the solder itself into the radiator. After that, slow down the work when you get down the crack until and unless it is fully covered with the solder. You must always remember to unplug the tool when you are done with soldering, as most of them do not turnoff themselves.

Third step is to drudge the solder has no sharp edges or burrs. This could be done with a wire brush or a small wheel. The concept behind is to make the solder line as easy as possible and also to remove the contaminants, if any are there. The repaired portion could be left alone or even repainted. You are required to fill the radiator with the coolant, which would allow the car get the operating temperature low, keeping your eyes on the soldered area for leaks.

How to Solder For Radiator Repair
Solder Iron

Special Price!!! Weller D550PK 120-volt Professional Soldering Gun Kit 260/200 Watts

Oct 23, 2011 07:46:39

Weller D550PK 120-volt Professional Soldering Gun Kit 260/200 Watts
Click for larger image and other views

Weller D550PK 120-volt Professional Soldering Gun Kit 260/200 Watts

>> Click here to update Cheapest prices for Weller D550PK 120-volt Professional Soldering Gun Kit 260/200 Watts <<

Weller D550PK 120-volt Professional Soldering Gun Kit 260/200 Watts Feature

  • Fingertip trigger selects high (260-watts) or low (200-watts) for controlled output
  • Designed with pistol grip for comfort and ease of use
  • Features twin lights to illuminate your work
  • Heats up quickly; ready to use in only 6 seconds
  • Includes an assortment of accessories in a molded plastic storage case


Weller D550PK 120-volt Professional Soldering Gun Kit 260/200 Watts Overview

Soldering Gun Kit 260/200W Soldering Gun With Tin Plated Copper Tip 2 Untinned Tips fluxbrush Soldering Aid Tool Coil 40/60 Rosin Core Solder Plastic Carry Case Soldering Hints Booklet.


SAVE NOW on the special offers below!

Available In Stock.

This Weller D550PK 120-volt Professional Soldering Gun Kit 260/200 Watts ships for FREE with Super Saver Shipping.

Price : Click to Check Update Prices Please.

Weller D550PK 120-volt Professional Soldering Gun Kit 260/200 Watts

Limited Offer Today!! Weller D550PK 120-volt Professional Soldering Gun Kit 260/200 Watts Black Friday and Cyber Monday Deals

Air Power Tool Vizio 47 Lcd

Technicians Tool Kits - These Aren't Your Father's Tools

The Term Technician Tool Kit is in my opinion such a broad term that could cover many aspects of Electronic Tools today. There are many different things to consider when making a purchase of this magnitude, especially when it deals with Electronic Tools that you will most likely be using daily as part of your new profession. I will not go into great depth on all of the different Technician Tool Kits that you could purchase, instead I will touch briefly on some of the more popular Electronic and Technician Tool Kits used today.

Solder Iron

The first Tool Kit I purchased was one that I personally used when attending school for Electronics. It came with a good 60 watt Soldering Iron and a Desoldering Tool. As an apprentice I think I probably went through twice as many Desoldering Tools than any other tool in the Tool Kit. Of course this Educational Tool Kit also included a student calculator, a professional Analog Multimeter, and other basics like pliers and cutters. It was moderately priced and had all of the essentials for the Electronic Student.

Solder Iron

Once you have graduated from Electronic training wherever that may be, you will have most likely chosen your favorite part of the Electronic Field in which you want to make a profession of. At this point you will most likely find that although the Electronic Tools you used while studying Electronics were quite adequate at the time, they will not be enough to continue with in your new founded career as an Electronic Technician.

If you will be working in the field of Computer Technology you may find it necessary to purchase specialized tools for repairing computers. While in other instances you may not only be servicing
computers, but you may also be involved with networking as well. In that case you may also want your Technician Tool Kit to includes test equipment like Lan Testers, Stud Finders and specialized Crimping and Networking Tools.

Telecommunications has become the industry of this century. The Technician Tool Kit for computers is certainly not going to contain all of the tools necessary to work on Telecom Equipment. In my opinion there are two choices when it comes to purchasing a Telecom Tool Kit and the choice you make should be based on whether you are Installing Telecom Equipment, or if you are repairing Telecom Equipment.

If your talents take you in the direction of installing Telecom Equipment then you need to start with a professional quality Butt Set. This will be the heart of your Telecom Tool Kit, so money spent here on a better quality Butt Set up front will save you time and money in the future. Along with a good Butt Set you should consider a professional grade Tone Generator as well. Both the Tone Generator and the Butt Set will be the heart of your Telecom Tool Kit, so don't skimp here, remember your tools reflect to your customer the quality of the work you do, long before you ever complete the job. Your Telecom Tool Kit should also include a good set of screwdrivers, pliers, cutters and punch down tool that will have interchangeable blades.

Now on the other hand if you are considering repairing Telecommunication Equipment then you should seriously consider purchasing what is called a Communications Tool Kit. It
includes a Butt Set, Tone Generator and Punch Down Tool, but will also include tools like Nut drivers, Precision Screwdriver Sets, Tweezers, Flashlight, Adjustable Wrenches and Electricians Scissors.

Service Technicians also require a specialized Tool Kit. Generally you will find included in these types of Tool Kits a professional grade Digital Multimeter, Security Screwdriver Set, Professional Grade Soldering Iron, Mini Vacuum Cleaner, Voltage Test Screwdrivers, Inspection Mirror and Wire Stripper.

Now needless to say these Technician Tool Kits contain many other Electronic Tools in them, but there are far too many to list here in this article. I have tried in this article to recommend the most important tools found in each type of Technician Tool Kit to help give you a better understanding of the differences between
each one and the importance to take the time to choose the Technician Tool Kit that will best fit into the field of Electronics your talents happen to take you.

Technicians Tool Kits - These Aren't Your Father's Tools
Solder Iron

Special Price!!! Neiko 40420L Tooluxe Cordless Soldering Iron

Oct 22, 2011 00:01:32

Neiko 40420L Tooluxe Cordless Soldering Iron
Click for larger image and other views

Neiko 40420L Tooluxe Cordless Soldering Iron

>> Click here to update Cheapest prices for Neiko 40420L Tooluxe Cordless Soldering Iron <<

Neiko 40420L Tooluxe Cordless Soldering Iron Feature

  • Reaches 365 Fahrenheit or 185 Celcius immediately, also cools down instantly
  • Maximum temperature is 1050 Fahrenheit or 565 Celcius
  • Features with a white LED light at the tip, light up the spot
  • Equivalent to a 15W soldering iron
  • Uses 4xAA batteries (not included)


Neiko 40420L Tooluxe Cordless Soldering Iron Overview

This cordless soldering iron provides you with the soldering ability of a 15W soldering iron without the restrictions of having to be tied down by the cords. Instantle reaching 365 Fahrenheit and with a maximum temperature of 1050Fahrenheit, this soldering iron only uses 4 AA batteries so it produces a lot of heat with little power.


SAVE NOW on the special offers below!

Available In Stock.

This Neiko 40420L Tooluxe Cordless Soldering Iron ships for FREE with Super Saver Shipping.

Price : Click to Check Update Prices Please.

Neiko 40420L Tooluxe Cordless Soldering Iron

Limited Offer Today!! Neiko 40420L Tooluxe Cordless Soldering Iron Black Friday and Cyber Monday Deals

Sharp Projector Bulbs

Aoyue 937+ Digital Soldering Station

Special Price!!! Aoyue 937+ Digital Soldering Station

Oct 21, 2011 00:02:18

Aoyue 937+ Digital Soldering Station
Click for larger image and other views

Aoyue 937+ Digital Soldering Station

>> Click here to update Cheapest prices for Aoyue 937+ Digital Soldering Station <<

Aoyue 937+ Digital Soldering Station Feature

  • Long Life Ceramic heat Element
  • Digital thermostat control ± 1° C
  • 24 volt output to prevent circuit damage
  • 45 watt Power consumption
  • Temperature range 200-480° C (392-897° F)


Aoyue 937+ Digital Soldering Station Overview

This is a 45 watt digital soldering station that has a 1 degree C control.Features:ESD SafeLong Life Ceramic heat ElementDigital thermostat control ± 1 C24 volt output to prevent circuit damageTemperature lock50 watt Power consumptionTemperature range 200-480 C (392-897 F)110 V ACPackage content:937+ station, B001 Soldering iron, 2630 Soldering iron holder, C001 Soldering iron spare heating element. Solder is not included with this item


SAVE NOW on the special offers below!

Available In Stock.

This Aoyue 937+ Digital Soldering Station ships for FREE with Super Saver Shipping.

Price : Click to Check Update Prices Please.

Aoyue 937+ Digital Soldering Station

Limited Offer Today!! Aoyue 937+ Digital Soldering Station Black Friday and Cyber Monday Deals

Projector Multimedia Damiana Extract